Why Golden Hour is My Favorite Time to Shoot

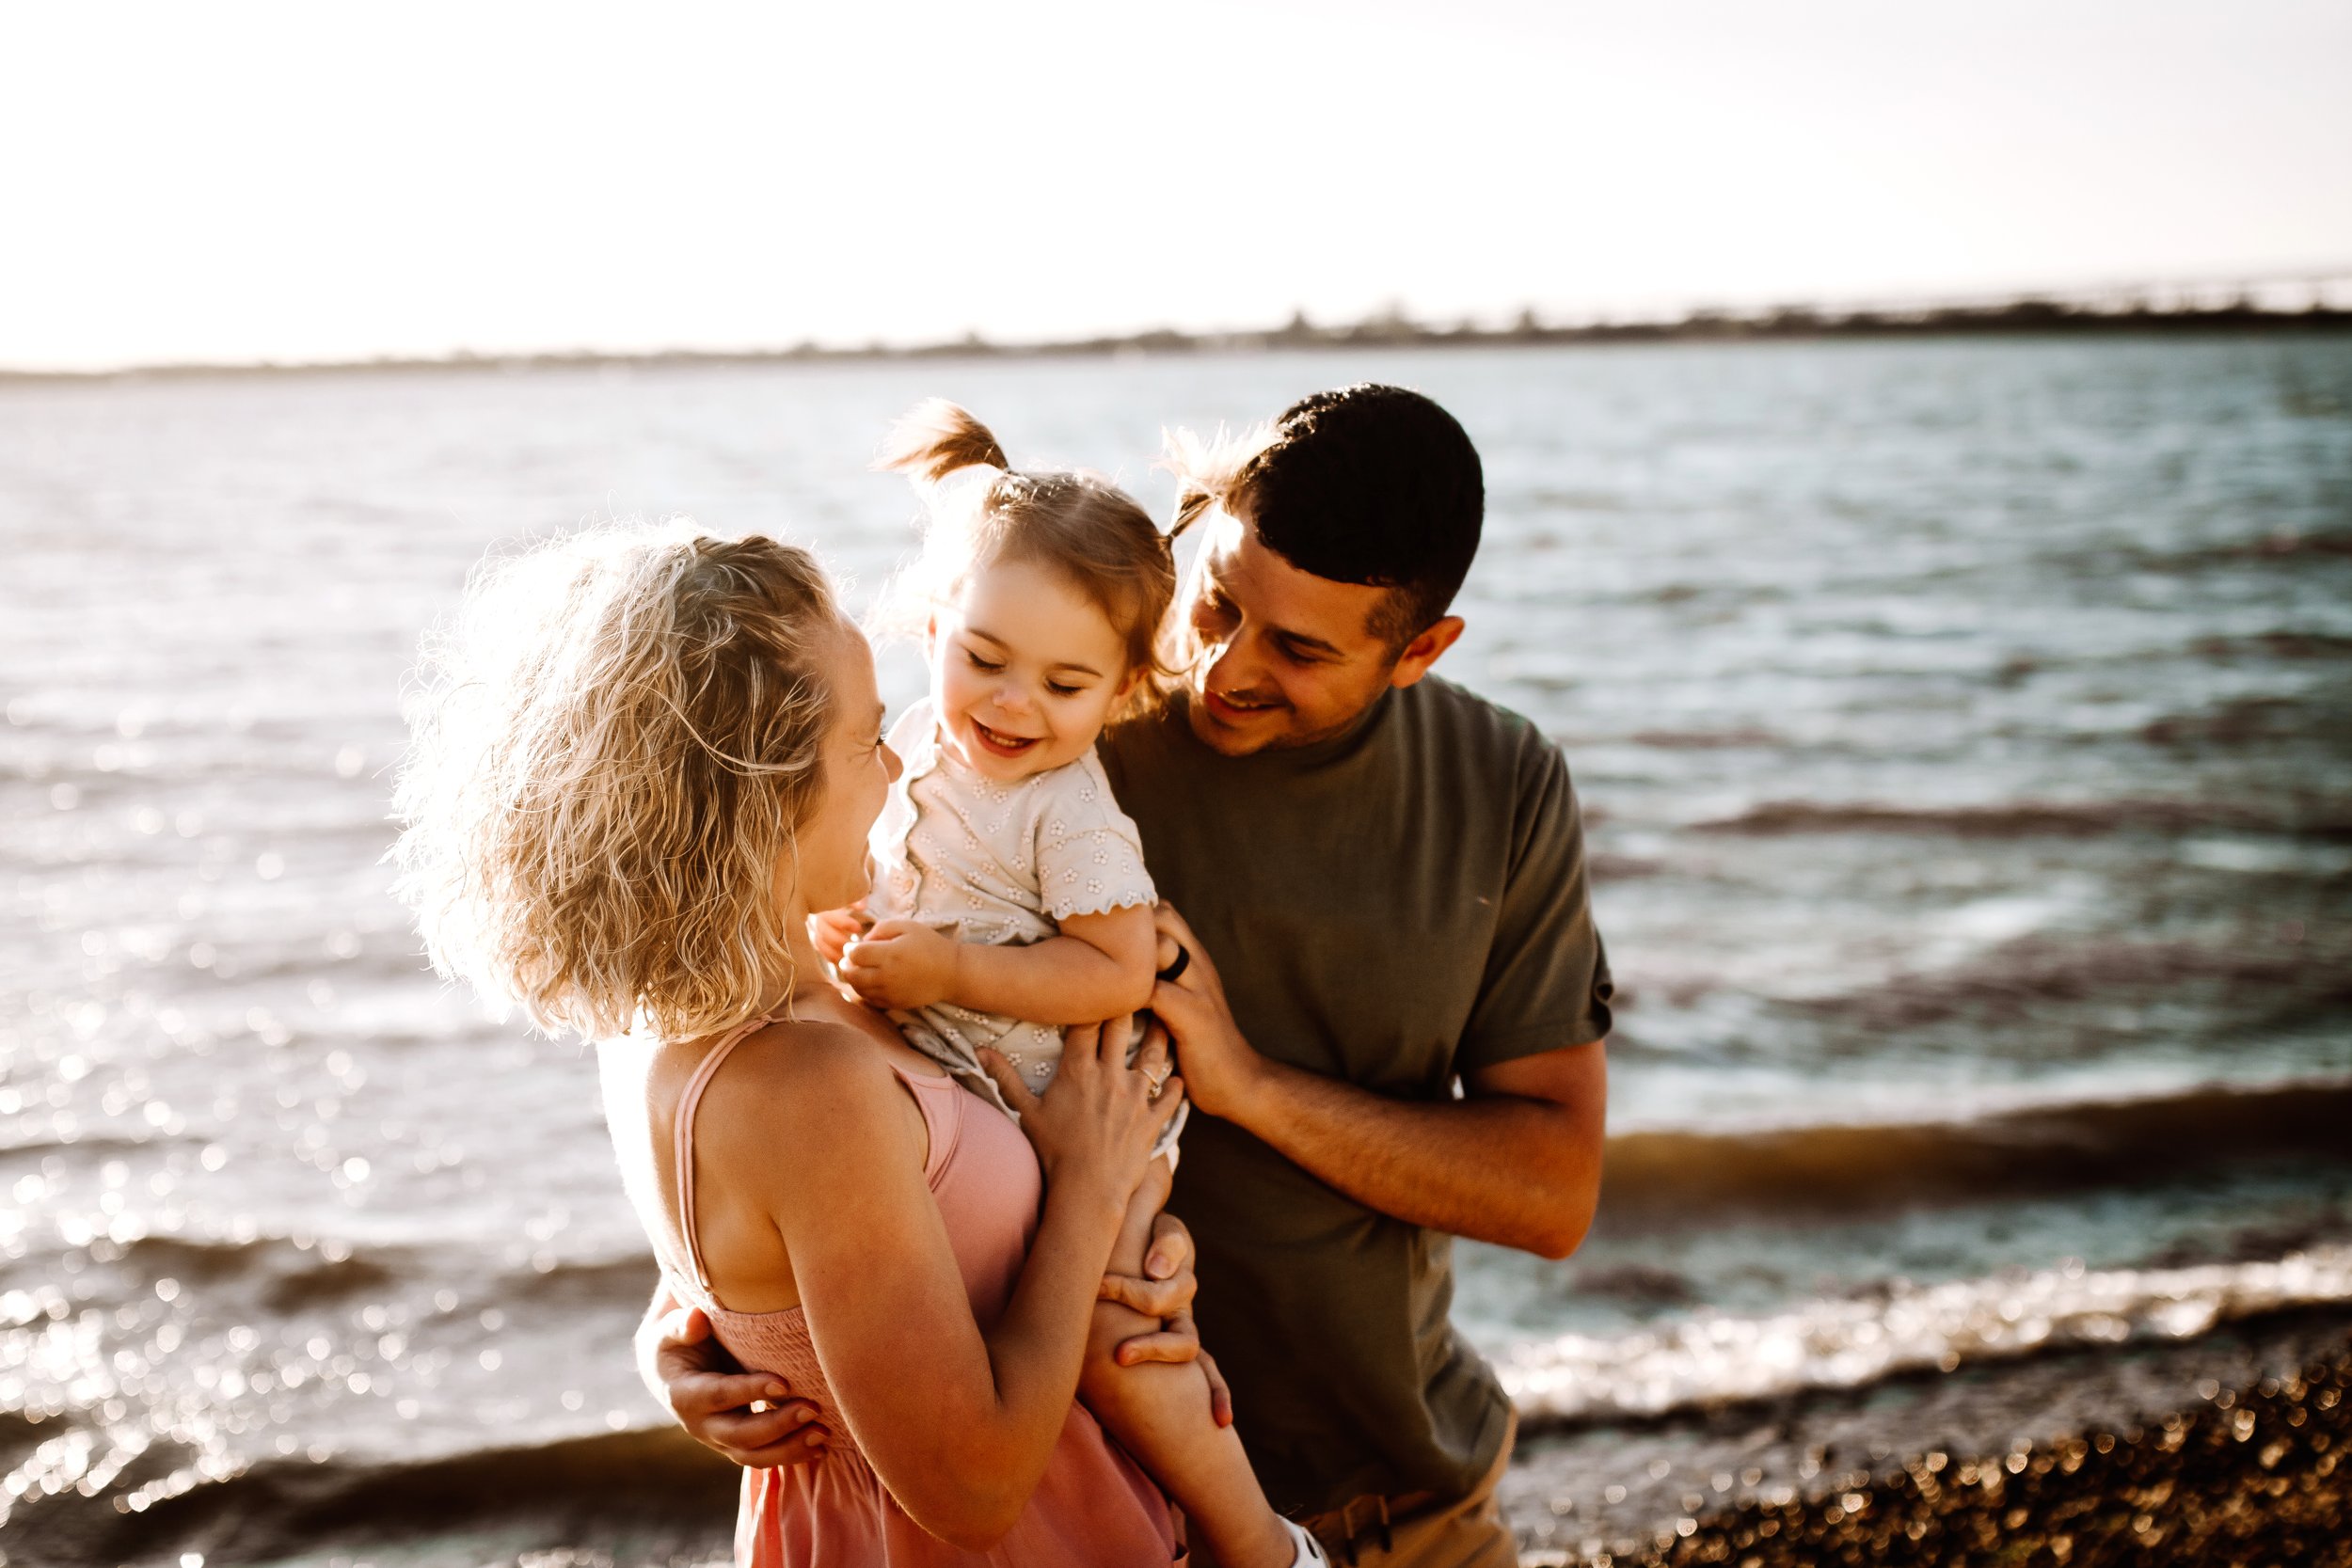
If you’ve been around for a while-or even if you’re new here- you’ll notice that the majority of my images are shot at Golden Hour.

What’s golden you might ask? Golden hour is the hour or so before sunset where the sun/sky gives off that gorgeous golden glow! It is my favorite time to start a session!

While, yes— it is 100% possible to still get beautiful images mid day, if done properly—you will get an entirely different look and very different colors as opposed to shooting later in the evening.

A lot of parents are hesitant this time of year to shoot at golden hour now that the sun is setting so late—trust me mamas, I GET it— but let me put a few little notes in your head to ease that anxiousness....

  • Kids LOVE being outside and there's so much to explore! Even if they get a little fussy, which I 100% expect past bedtime and it is 100% normal, it's usually an easy fix with a few distractions and some silly noises

  • You cannot, cannot, cannot recreate that amazing light. Period. The golden colors are something you just can't replicate during the day. If you’re hiring me, I assume it’s because you LOVE my work, so trust me!

  • CANDIDS. Candid images are my GO-TO. If I was a little kid, I wouldn’t want to sit and smile at a random person with a camera either. Let me help east the stress of “posing” and just enjoy your family. Playing together, snuggling and laughing make for the perfect photos, and help your little ones feel less stressed. Also, when all else fails—I brring snacks. Snacks always win.

Trust me when I say it is WORTH IT. If all of this still doesn’t ease your mind, and you’re still unsure about letting the kiddos stay up late for photo day, I would definitely suggest considering a fall family session instead of summer! The sun sets around 5pm in the fall, so golden hour occurs a lot earlier—allowing you to get the look you want AND get those kiddos to bed on time!

What Type of Newborn Photography is Best for You? | Lifestyle vs. Posed

Congrats! You’re expecting a new little babe and are over the moon! You definitely want to capture this time together, but you’re not sure what style you’re looking for. That’s the best thing about photography, there’s something for everyone. A newborn is only a newborn for about 3 weeks, so with such a limited amount of time, you’ll want to start planning as soon as possible-I always suggest to start looking before your 3rd trimester-you only have small window once that little babes is born! Now… let’s get into it.

What IS the difference between a lifestyle session and a posed session

Posed/Studio Newborn Photography

Posed newborn photography is exactly how it sounds. Posing your sweet baby on different props and backdrops to capture those sweet little features. The photographer will control all lighting and use tons of props such as buckets/baskets and wraps. We love to get that sweet babe all curled up and sleepy!!

Parent shots are always included in these as well, but are also “posed.” I usually use a solid backdrop for parent shots and a flokati rug/ backdrop for siblings! Studio newborn sessions take place around 10-15 days old while your baby is still sleepy and “bendy” as I like to say. Scheduling these UNDER a week is also a bit tricky, as we try to avoid cluster feeding and want to give you, mom, some time to recover and get into somewhat of a schedule. The session take about 2-3 hours depending on how sleepy baby is. Parents are able to sit back and relax, trusting their photographer to handle the session from start to finish (your babe is in GREAT hands).

Lifestyle Newborn Photography

A lifestyle session is a lot more “laid back” and takes place in the client’s home. It tends me a lot more candid, just capturing your family and your day to day lives. Think snuggles and giggles!! The timeframe for these are also a bit more flexible, as we don’t need to do as much posing. I would say to try and get these scheduled within the first 4-6 weeks. These typically use natural light as opposed to studio light and use very little to no props. This type of photography is best for parents who may not want to travel with their new babe or who want a more “candid” look for their images. Lifestyle photography is great for those intimate family moments that you want captured and typically last about 1-1.5 hours. Documenting real life and moments that may otherwise be overlooked.

Now that you know the differences between the two, hopefully this helps makes your decision a bit easier! There’s no right or wrong answer, just whatever works best for your vision and your family!

The Bucket Pose-Southern New Jersey Newborn Photographer

Ahh- the most requested pose- The Bucket Pose! Every parent receives a styling questionnaire when booking, where they can select their preferred colors, props, poses etc, and almost every single time, I get the bucket request! I mean…It’s just so cute-what’s not to love about a snuggly little baby in a bucket?!

While this pose used to scare the living poop out of me, it’s because I never really knew how to SAFELY execute this pose until I took the time to learn. Now, it’s one of my favorites- I absolutely love styling these bucket sets, giving them each a unique look.

I often get asked how I achieve this pose, and I’m a really big fan of community over competition in the photography world, so I’m happy to share some tips below!

Please note- if you are NOT a professional photographer, please do not attempt this at home,

Tips for the bucket pose and how I style it

  • Baby must be SUPER sleepy. For most of the “posed” images you see online, baby is in a very deep sleep in order for me to pose them without any resistance. I keep my studio at 78 degrees and constantly play white noise in order to help keep the baby feel warm and comfortable. Providing clients with gorgeous images, starts within the studio and keeping your baby nice and calm and happy.

  • Place a weight or something heavy at the bottom of the bucket. The LAST thing you need is that bucket getting top heavy and falling over. You want to make sure baby stays in place the entire time, even after you take your arms away.

  • Keep Baby WRAPPED. This pose gives off the illusion that baby is fully naked, however, I always keep their feet nice and wrapped to avoid any kicking or pushing out and launching themselves forward. Newborns are so much stronger than we think, and this of course could be a danger to them, so to keep your baby safe, I always keep their feet wrapped up nice and take their arms out.

  • Pay attention to baby’s size. While I pretty much use the same bucket base for every session, the size of baby plays a big part. If I am photographing a smaller baby, I will need more posers and/or blankets inside my bucket so that they fit better, and visa versa for a bigger baby. I do also have a few bigger buckets that I occasionally like to use as well.

  • Baby needs to always be fully supported. Sometimes, baby is able to keep their head up by themselves if your beans and posers are placed correctly. Always make sure they are nice and snug in the bucket before stepping away. If baby still seems to be tilting their head or leaning, have an assistant keep one finger on their head for some extra support.

  • Pose the arms before placing them in the bucket. This makes for an easier transition. You want to move and maneuver the baby as little as possible once they are in the prop. Pose their arms, while the baby is in your lap, and then move them into the bucket. This keeps their head supported through the whole transition and you're not grabbing their fragile limbs too much.

  • Hook the elbows. This means that you have to hook their elbows over the rim of the bucket so baby does not slip downward or start to sink. This is why it's ever so important to place weights inside of the bucket so it will not be top heavy once the elbows are placed.

Well, that’s all I have for today! Remember mamas, these tips are for my photographers who have newborn posing experience and background safety training. Please, again, do not attempt any of these poses at home!

Take a look at some of my favorite bucket sets!

Motherhood Session-Southern New Jersey

Mommy and me sessions are SO special to me- and I’ll tell you why-

How many memories have you, as mom, been behind the camera photographing your family? How many photos of 𝒚𝒐𝒖𝒓𝒔𝒆𝒍𝒇 and the kids do you have? So often moms are the one’s behind the camera—they are capturing the moments, but aren’t there in any of the moments when looking back on them! That’s why I always make it a point to get mamas in FRONT of the camera when they get a chance!

Now I completely understand that some mamas hate the thought of being photographed, especially if you are a exhausted and burnt out, but think of this as an opportunity to pamper and treat yourself!

Trust your photographer to get all the right angles, and just enjoy the moment with your kiddos!

This mama came to me originally for an extended family session, but due to multiple reschedules, her session turned into a mommy and me session—which turned into one of my favorite sessions to date!

Any session can be hard with kiddos, especially younger ones, so candids are always the way to go! These girls were full of smiles and laughs, so they made my job super easy! All I had to do was tell them to run and play and the rest was magic!!

Take a look the rest of the images from this session—and if you’re a mama yourself, think about scheduling your own mommy and me session. I promise you won’t regret it!

Fun Alternatives for Displaying Your Photos

Amazing photos deserve an equally amazing display but this doesn’t mean you always have to use a traditional frame to showcase them in your home. Below is some inspiration for deciding how to display your favorite memories.

If your home décor is very contemporary you might want to consider canvas gallery wraps, image blocks or standout mounts to showcase your photos. Going frameless is also a great option if you’re looking for something truly sleek and modern.

If rustic and chic is more your style, then why not turn old pieces of wood into stained photo clipboards, using binder clips to hang the photos against the wood. Another unique option is to hang your photos on a thin cable to make it look like a clothesline. Binder clips also work perfectly for this.

If you are a fan of frames, why not buy different sizes, colors and styles and create one big photo wall that displays a variety of memories. There are so many shapes and designs that you can use to create your photo wall and really make it your own. 

Since we work with so many creative vendors who offer a wide variety of traditional and non-traditional framing and display options, we are able to help you pick a unique option that suites your home and style.

Whether it’s a traditional frame with hand-cut matting, shadow box or canvases, we will help you pick the right option for your home.  No matter which method you choose, get creative. Filling your walls with a lifetime of memories is one of the most special and visual ways to tell the story of your family, so get hanging.